Use CDK + CK-Link to compile and debug
Open Hello World
After obtaining the SDK, enter the
examples/hellowd/helloworld/cdkdirectory in the SDK, double-clickhelloworld.cdkproj, and you can open theHelloworldproject
Compile Hello World

helloworld.cdkproj
In the drop-down menu, you can select the
CK_Link_DebugorOpenOCD_Debugproject, this tutorial is based on theCK_Link_DebugprojectIn the CDK toolbar, click the compile icon to compile the project
Click the icon
Build Projectat1to compile the currently selected projectClick the icon
Clean Projectat2to clear the result of the last compilationClick the
3iconFlash Downloadto download the compiled code to the chipClick the icon
Start/Stop Debugat4to perform debugging related operations (when usingCK-Link, you can load the code to flash first)Click the
5iconStart/Stop Debug whitout Downloadto debug directly without loading the current bin fileYou can also right-click the project name in
Project, and compile the project through the options in the right-click menu
Program Hello World
Since our flash algorithm is not currently included in the CDK software, we need to put the flash algorithm in the CDK installation directory. The specific operations are as follows:
Enter the
tools\cdk_flashloaderdirectory under the SDK directoryCopy the
bl70x_flasher.elffile in the directory to theC-Sky\CDK\CSKY\Flashdirectory of the CDK tool

CDK Flash Loader

CDK Project Setting
Click the project setting button in the
Project Viewto open theProject Settingwindow, or open it through theProjectmenu barIn the opened
Project Settingwindow, select theFlashtab to configure the required Flash algorithm

CDK Project Flash setting
In the
Flashtab, click theAddbutton, select thebl70x_flashalgorithm in the opened list, and clickAddto add it to the project. Others inFlashconfiguration, as shown in the figure:After clicking OK, if the configuration is correct, click
Flash Downloadto download the compiled code to the chip

CDK Flashdownload Success
If the download fails, please check:
Whether the code is compiled correctly and generate files such as
.elf,.bin, etc.
Is the Flash algorithm correctly set?
Whether the CK-Link and the board are properly connected
Whether the development board is powered normally and whether the power indicator is on
Run Hello World
From the menu bar of the CDK
View->Serial Pane, open the serial port panel, right-click in the openedSerial Pane, set the serial port, select your corresponding serial port number and baud rate


CDK Serial Pane setting
Press the
RSTkey on the board, you can see the result of the code in the serial port

HelloWorld!
Debug Hello World
Click the
Start/Stop Debuggerbutton at the top of the toolbar to enter the debug interface, as shown in the figure below

Debug HelloWorld!
In the debug interface, the
Registerwindow can view theCPUinternal register data; thePeripheralsperipheral panel, you can view the corresponding peripheral register data, the top menu barPeripherals-> System Viewercan select peripherals; click the relevant debugging button in the upper toolbar to perform operations such as breakpoint setting, single-step debugging, single-step instruction, and full-speed operation. Of course, these operations have corresponding shortcut keys and shortcut setting methods. For details, please refer toCDK Help.We click the single step button to run the code, and we can see that the cursor moves to the next sentence of code, and we can see our output
Hello World!displayed in the serial port panel.
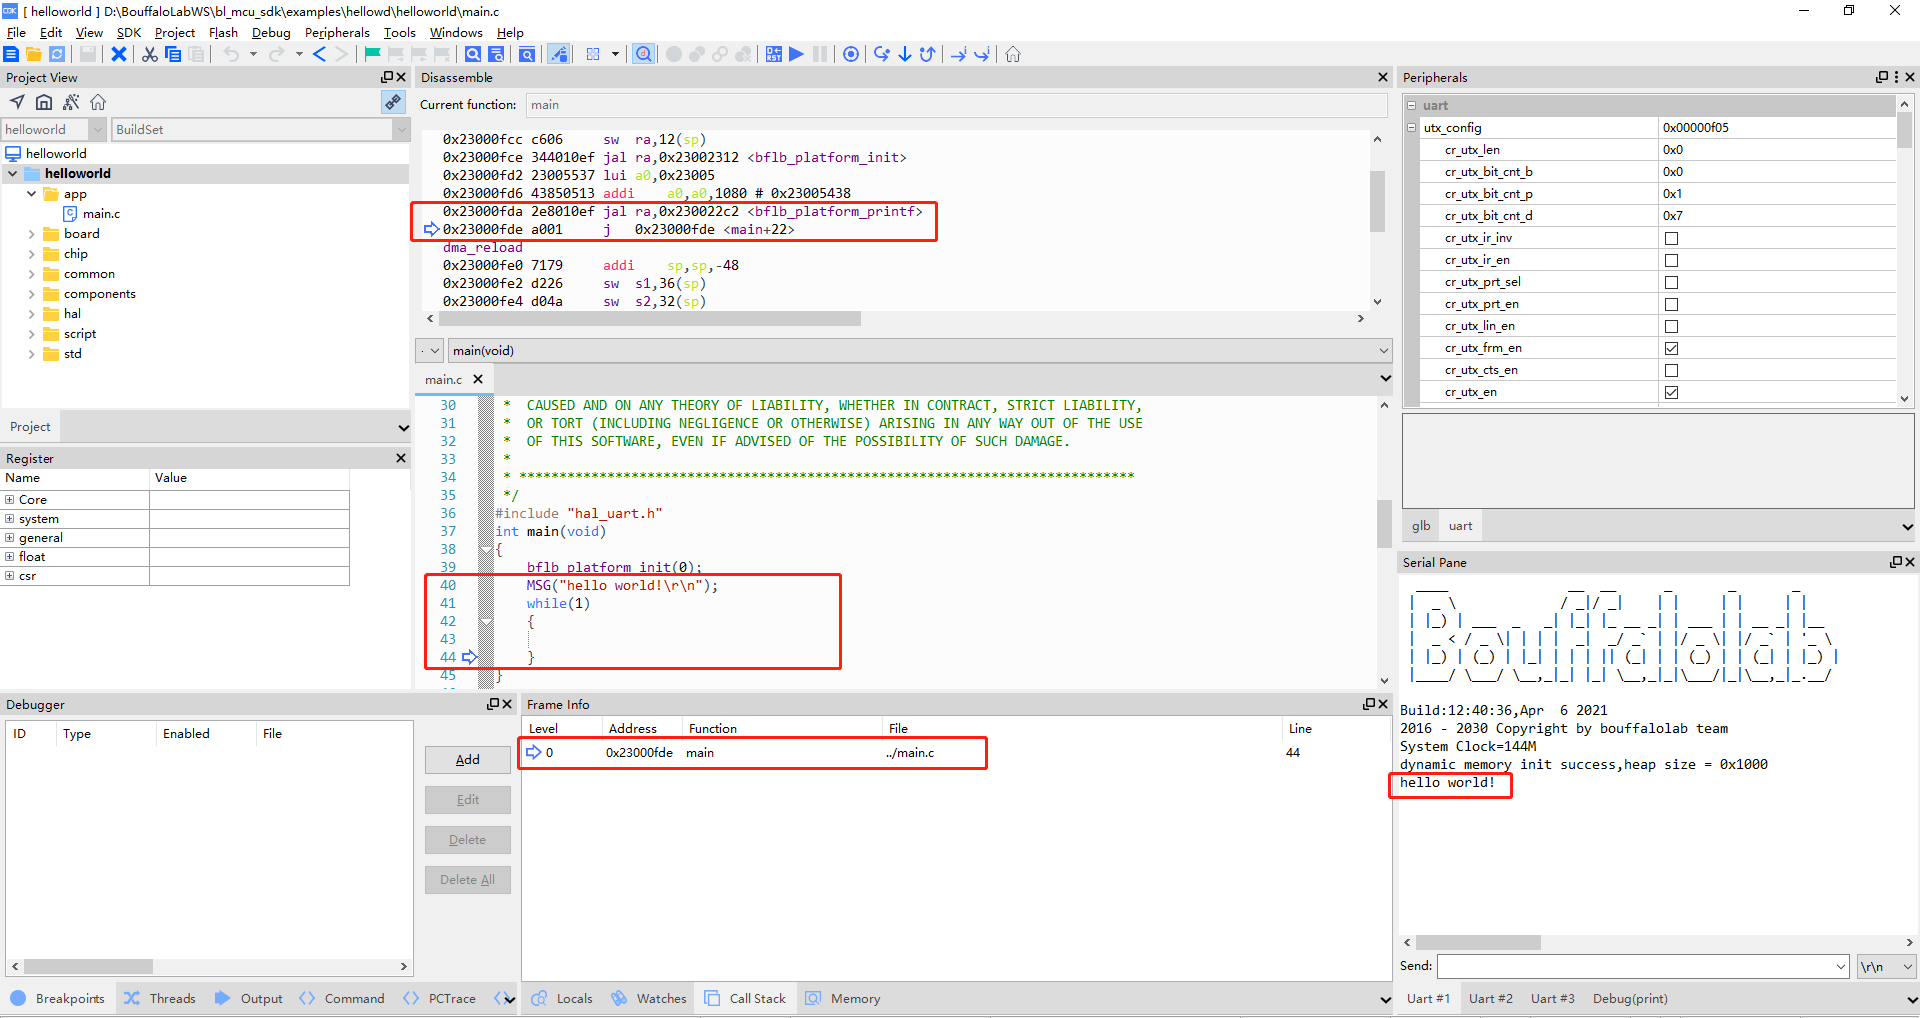
Debug HelloWorld!