3.2. Eclipse Development Guide under Windows
This document introduces the use of eclipse under Windows to build a software development environment for BL702 series MCU.
3.2.1. Software and hardware environment
Eclipse free installation package
Serial port assistant software
A USB Type-A data cable
A j-link emulator
A USB-TTL serial port module
Several Dupont lines
3.2.2. Download Eclipse
Download the installation package with the RISC-V toolchain from the Bouffalo Lab developer community Eclipse https://dev.bouffalolab.com/download .
3.2.3. Download bl_mcu_sdk
Download from the open source community bl_mcu_sdk.
You can use
git cloneor directlydownloadto download the SDKBefore using
git clone, please make sure thatgithas been installed correctly. Open a terminal that supportsgitand enter the following command to get the latest SDK.
1$ git clone https://gitee.com/bouffalolab/bl_mcu_sdk.git --recursive
3.2.4. Configure eclipse
Copy the eclipse compressed package to the working directory, unzip the eclipse compressed package
Enter the eclipse directory, double-click
eclipse.exeto start eclipseSelect your
Workspacedirectory, clickLaunchto enter the workspace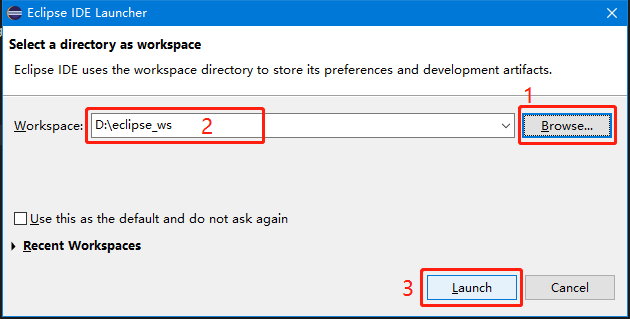
Click
Window->preferencesin the menu bar to open the environment configuration related page, ready to import the related configuration environment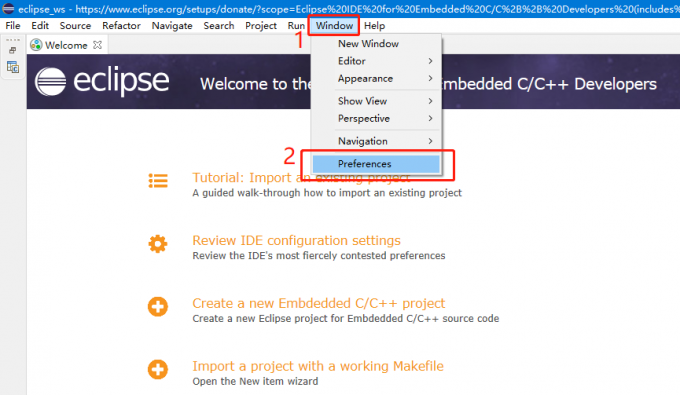
- Click the icon at “1” in the figure below to open the import configuration interface, follow the steps shown in the figure, and select the
bflb_mcu_preferences.epfconfiguration file in theeclipse.exedirectory. 
- Click the icon at “1” in the figure below to open the import configuration interface, follow the steps shown in the figure, and select the
After selecting the corresponding file, click
Finish, select and clickcancelin the dialog box without restarting.
3.2.5. Import bl_mcu_sdk
Click on the menu bar
File->Importto open the configuration interface of the imported project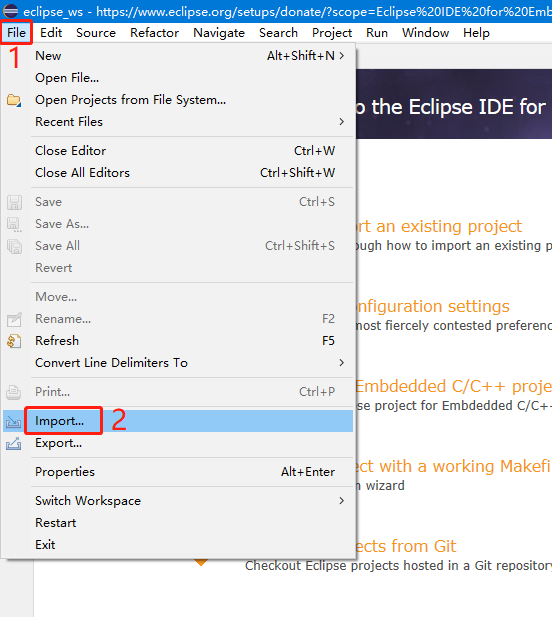
In the opened
Importwindow, selectGeneral->Existing Projects into Workspace, and then clickNext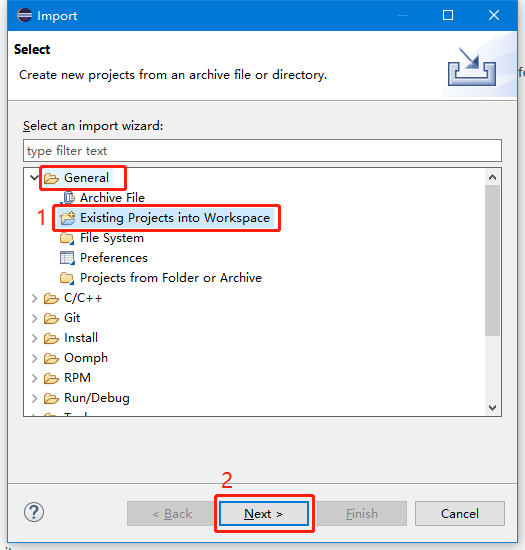
After loading the project path of bl_mcu_sdk, click
Finshto complete the import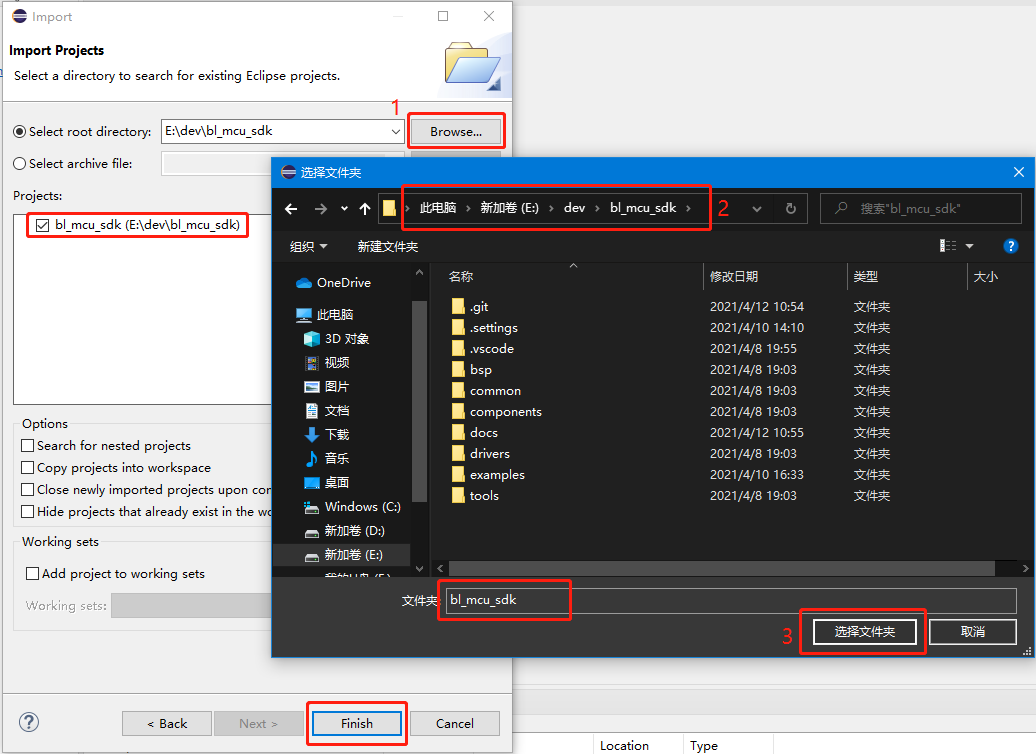
After the import is complete, close the
Welcomewindow to see the imported project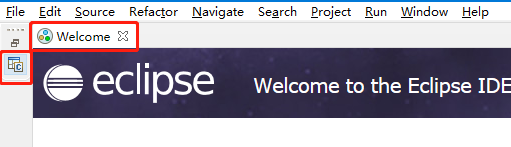
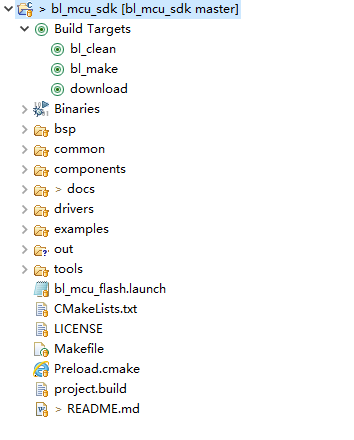
Expand
Build Target, you can see the three function buttonsbl_clean,bl_make, anddownload.Double-click the
bl_cleanbutton, it will clear the compilation cache in thebuildandoutdirectoriesDouble-click the
bl_makebutton, the set case will be compiled normally, if the default configuration is not modified, thehelloworldproject will be compiledDouble-click the
downloadbutton, the code will be downloaded to the chip, if it is not compiled successfully, the default or last.binfile will be downloaded
3.2.6. Hardware connection
For specific board connection, please refer to Hardware connection; (The eclipse environment recommends using
j-linkfor programming and debugging)Please make sure that the development board is set up correctly before proceeding to the following steps
3.2.7. Test the Hello World project
Open Hello World
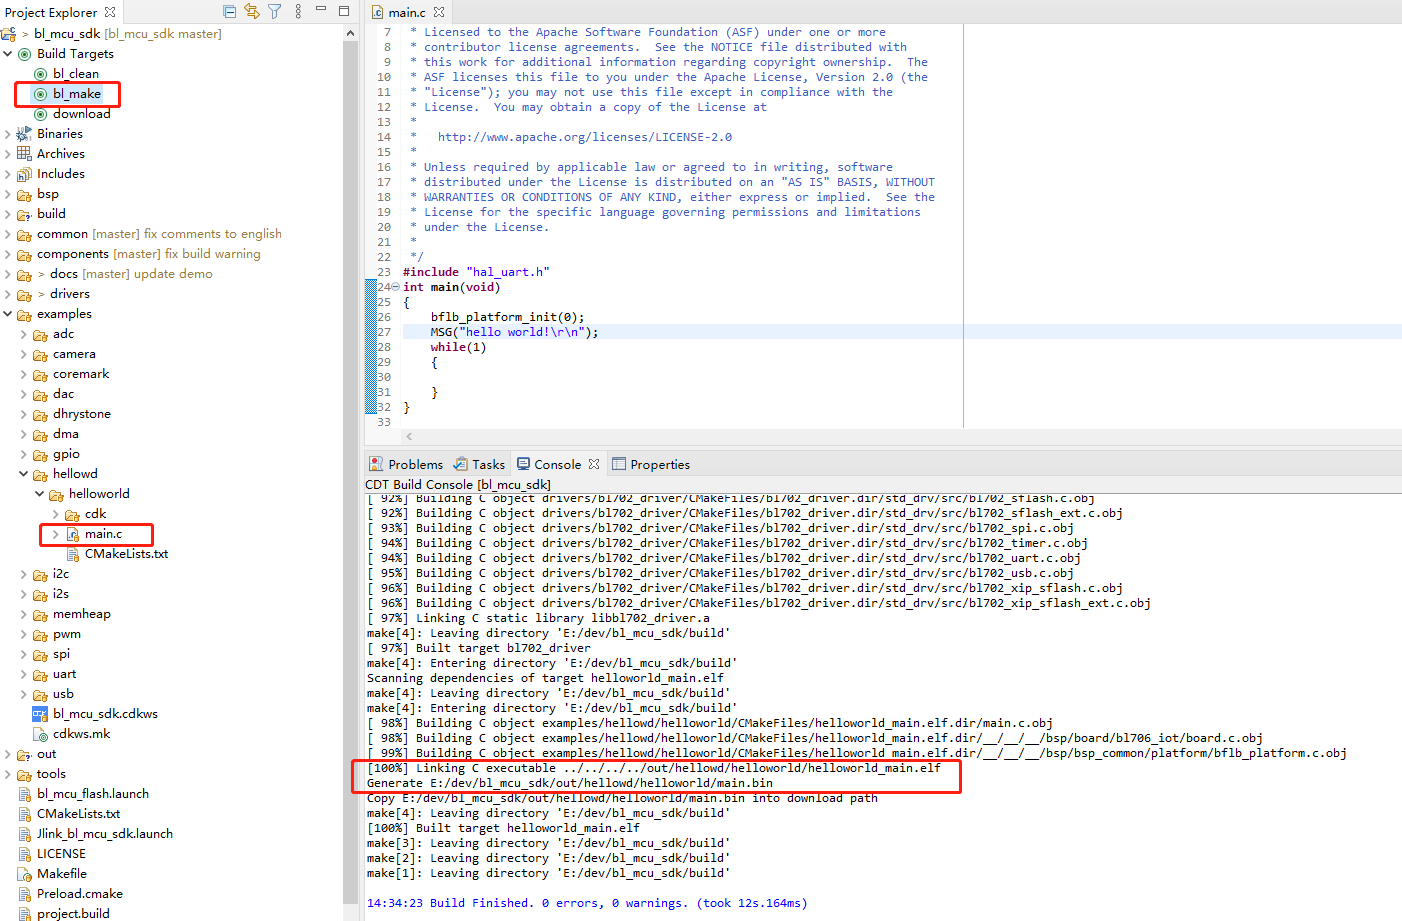
Open
examples/hellowd/helloworld/main.c, you can edit and modify the code of thehelloworldtest demo. If you modify it, please save it and execute the compilation
Compile Hello World
Double click
bl_maketo compile the helloworld projectAfter successful compilation, you can see the log information as shown in the figure below in the
Consolewindow
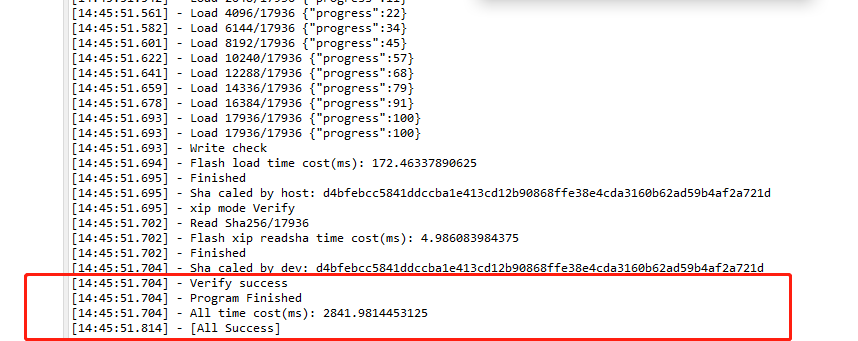
Program Hello World
Double-click
downloadto program the helloworld projectbinfile to the chipAfter the download is successful, you can see the log information as shown in the figure below in the
Consolewindow
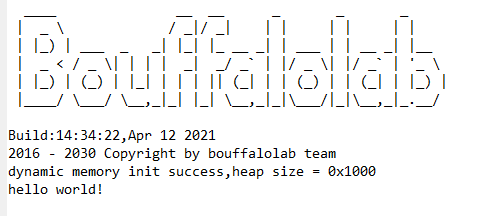
Run Hello World
Connect the
TXD0,RXD0andGNDpins of the board to the USB-TTL serial port module with a DuPont cable, insert the serial port module into the PC, and use any serial port assistant software to open the serial portAfter the programming is successful, press the
rstbutton on the board. If the download is correct, you can see the log information as shown in the figure below in the serial port assistant software.
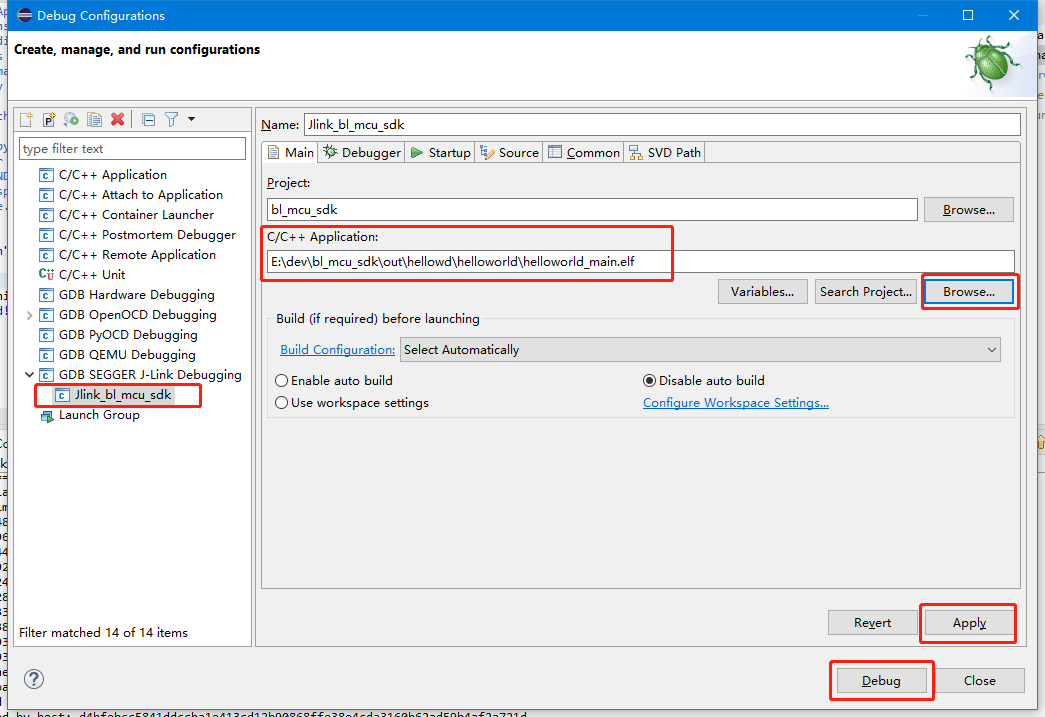
Debug Hello World
Click the
Debugbutton in the eclipse toolbar to enter the debug configuration windowSelect
GDB SEGGER J-Link Debugging->Jlink_bl_mcu_sdk, select the.elffile that needs to be debugged inC/C++ Application:Click
Applyfirst, then clickDebugto startDebug
After entering the Debug interface, you can see that the program stops at
main, click theStep Overbutton in the upper toolbar to perform single-step debugging of the code project.
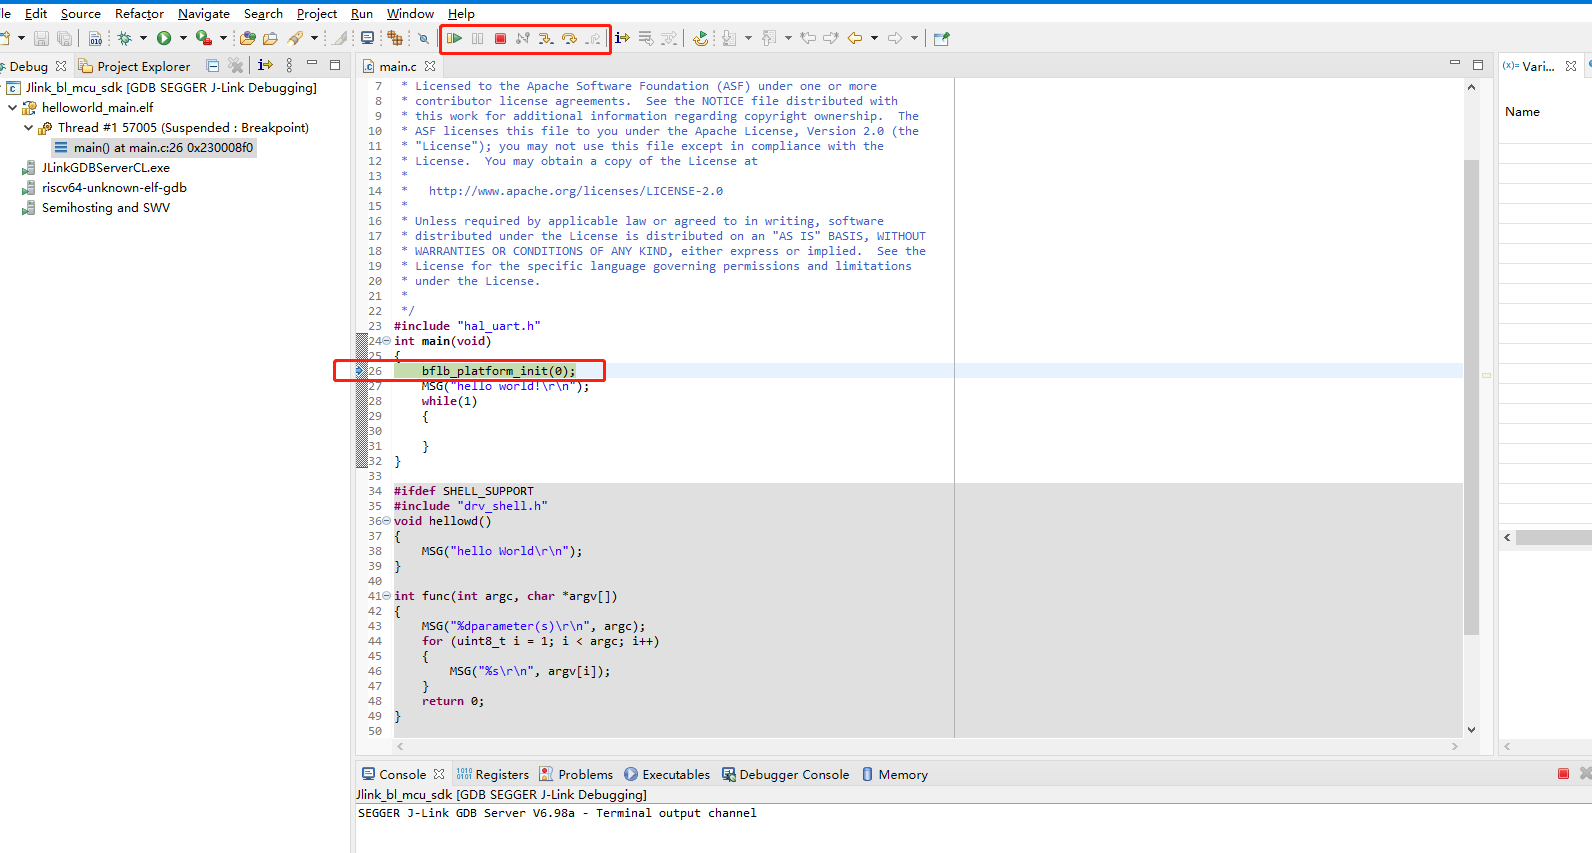
Eclipse Debugging
3.2.8. Compile and program different target projects
When you right-click the
bl_makebutton and clickEdit, the configuration interface for replacing the target project will pop up, as shown in the figure below

Where
APP=xxxcan be changed to the name of the target project that needs to be compiled and programmed. For example, if you want to compile and program thegpio/gpio_blinkproject, modify it toAPP=gpio_blink.make BOARD=bl706_iotinBuild commandwill specify different Board types to adapt to different types of boards.The
Boardtype determines the correspondingboradheader file when compiling. The default selection ismake build BOARD=bl706_iot