6. BLDevCube start guide
This document mainly introduces the use of Bouffalo Lab Dev Cube for code programming. For more details, please refer to BLDevCube user manual
6.1. Download Bouffalo Lab Dev Cube
Download the version suitable for your operating system from the developer community, download address:https://dev.bouffalolab.com/download
For users who do not have a registered account, click on the guest portal
After the download is complete, you can use it after decompression
6.2. Configure tool download method
Double-click
BLDevCube.exe, in theChip Typedrop-down box, select the corresponding chip model, clickFinishto enter theDev CubeinterfaceEnter the interface, select
MCUunderViewin the menu bar to enter the MCU program download interface
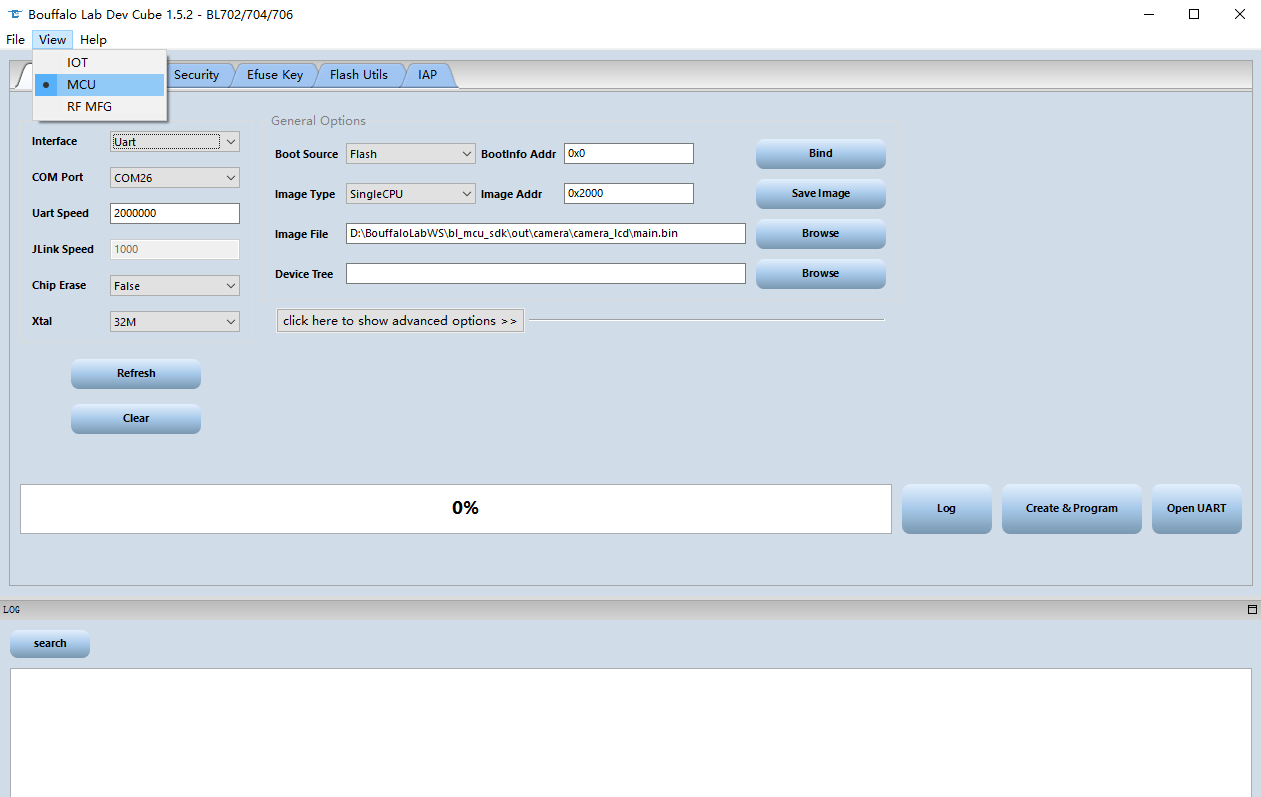
select mcu
Select the corresponding download method in the
Interfacecolumn underImage, and choose according to your actual physical connectionImage fileconfigure the absolute path of the downloaded image, clickBrowseto select the Bin fileWhen you click
click here to show advanced options, the advanced mirroring configuration will be expanded, usually keep the default configuration; it should be noted thatFlash Clockwill affect the clock frequency of Flash and PSRAM at the same time , If you need to use PSRAM, you can increase the clock frequency to get better performance
6.2.1. Download with UART
COM Portis used for UART download, select the COM number connected to the chip, and clickRefreshto refresh the COM numberWhen
Uart Speedis used for UART download, configure the appropriate baud rate, the default is 2MPlease make sure the hardware configuration is correct before downloading:
Use
Type-C USBorMini USBto connect to the corresponding USBType-Cport orMiniport on the board.Press the
Bootkey on the board, don’t release itPress the
RSTkey on the board, now you have enteredBoot ROMmodel, you can release the two keysAt this time, you can see the corresponding serial port
COMnumber from theBouffalo Lab Dev Cube, if it does not appear, please click theRefreshbutton to refresh
After completing the above configuration correctly, click the
Create&Programbutton to downloadAfter the download is successful, you will see the status bar turn green and display
Success
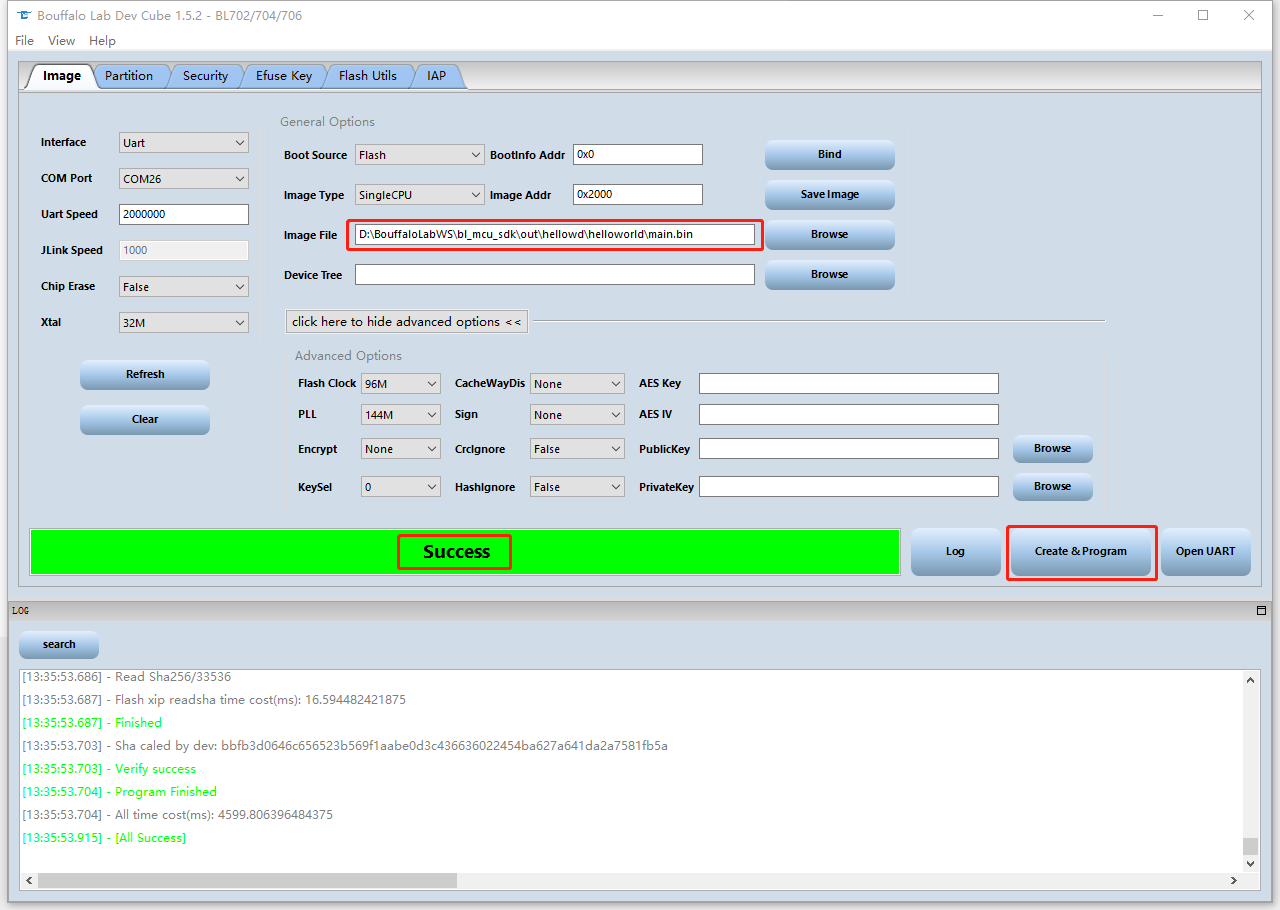
download success!
6.2.2. Download with Openocd
Download using openocd is basically the same as using serial port download option configuration, just switch
InterfacetoOpenocdThe hardware connection needs to be changed to a debugger connection that supports Openocd (this tutorial takes Sipeed RV Debugger as an example):
Connect the RV debugger to the USB port of the computer, open the device manager, you will find that the debugger is recognized as two serial ports (note: not the serial port on the board)

Download the
zadig-2.4replacement driver from sipeed. Download link: http://dl.sipeed.com/MAIX/tools/sipeed-rv-debugger/zadig-2.4.exe
After downloading, double-click to open
zadig-2.4.exe, and check List All Devices in Options.
Find JTAG Debugger (Interface 0), then select the replacement driver as WinUSB and click Replace Driver to replace
Open the device manager again and see that one of the serial ports has been replaced with a universal serial bus device, indicating that the installation is successful

Connect the JTAG pins of the debugger with the JTAG pins of the board
After completing the above configuration correctly, click the
Create&Programbutton to downloadAfter the download is successful, you will see the status bar turn green and display
Success
6.2.3. Download with Jlink
The tool configuration for downloading using Jlink and Openocd is basically the same, just switch
InterfacetoJlinkThe hardware connection needs to be changed to use Jlink connection (this tutorial takes Jlink V11 as an example, it is recommended to use Jlink V10 or later):
Download the appropriate Jlink driver from Segger official website and install it
Connect the Jlink debugger to the USB port of the computer
Connect the JTAG pins of the JLink debugger with the JTAG pins of the board
After completing the above configuration correctly, click the
Create&Programbutton to downloadAfter the download is successful, you will see the status bar turn green and display
Success